 NLJUG – Nederlandse Java User Group NLJUG – de Nederlandse Java User Group – is opgericht in 2003. De NLJUG verenigt software ontwikkelaars, architecten, ICT managers, studenten, new media developers en haar businesspartners met algemene interesse in alle aspecten van Java Technology.
At this point, most of us know Machine Learning (ML) as recognizing patterns in your data, anticipating the likely future behavior of similar data and taking steps to maximize benefits based on those predictions. It represents a massive change in how we solve problems and has long-term effects to the very foundations of computing and to the world in general.
Kevin Berendsen
Most ML toolkits require you to learn Python. Python is one of the leading programming languages in data science and ML. But there are 10 million Java developers on the planet that need to build world-class production ML applications that leverage our years of expertise in development and deployment.
This article will cover a deep learning introduction and create a ML model that will be able to classify Star Wars aircrafts in just a few lines of code using Java Specification Request #JSR-381.
JSR-381
The goal of JSR-381 is to develop a standardized Java-friendly API which can be used to solve small and complex tasks by applying ML specifically to visual recognition use cases.
Each ML engine (e.g. TensorFlow & Deep Netts) has its own way of accepting input. It is a relatively large effort to standardize this type of input and therefore it won’t be covered in this JSR. For now, the following features will be included into JSR-381 to simplify training and using the ML model:
- Binary classification to classify input which has the outcome true/false, yes/no, dark/bright, etc;
- Image classification to classify an image as input and the outcome of two or more trained labels, depending on the model;
- Object detection to detect and classify one or more fragments in the image as input and one or more trained labels as outcome;
- Training tools to build the ML model for binary classification, image classification and object detection.
At the same time as the development of the API, the first implementation of the API will be developed as well. This is the so called “Reference Implementation” (RI) which will meet all the requirements of the API as prescribed by the Java Community Process (JCP). The RI of JSR-381 uses Deep Netts, an open source deep learning engine written in pure Java. Amazon has its own implementation of JSR-381 which will support TensorFlow, Apache MXNets and other upcoming engines using their abstraction API called Deep Java Library (DJL).
Supported algorithms
Not every developer is a mathematician. Neither am I. With JSR-381 you won’t have to understand the underlying math of these algorithms because it’s developed to allow you to use common Java design patterns instead of generated wrappers for native libraries. JSR-381 will only support neural networks by default and exposes a high level API to use. Each implementation of JSR-381 will have to support neural networks but may also expose other algorithms and implementation specific algorithms to solve complex problems, which are better solved by algorithms other than neural networks. This way JSR-381 can be used by beginners and advanced ML Java developers alike.
Quick dive into understanding classification and deep learning
Classification is commonly used to determine whether the given input is answer A, B or even C. For each classification model, it needs a given set of labels and a prepared dataset. A part of preparing the dataset is labelling the data. For example: a picture of a cat is labeled as cat and a picture of the dog is labeled as dog. This way the ML model will be able to learn and tell whether a newly given picture has to be classified as a cat or a dog. As previously explained, binary classification will only contain two labels which will be complete opposites of each other. The scenario of the dog and the cat is binary classification as well. But it might also need to classify all bird pictures as birds. Afterwards the dataset and labels will be expanded with new data and the model will be retrained to classify cats, dogs and birds. This is called multiclass classification.
MNIST is the best-known multiclass classification ML model. MNIST is able to classify numeric characters from 0 to 9. Every ML engine has an example using MNIST because the dataset is free to download. Furthermore, the MNIST dataset has already been prepared to be trained with high accuracy.
Deep learning
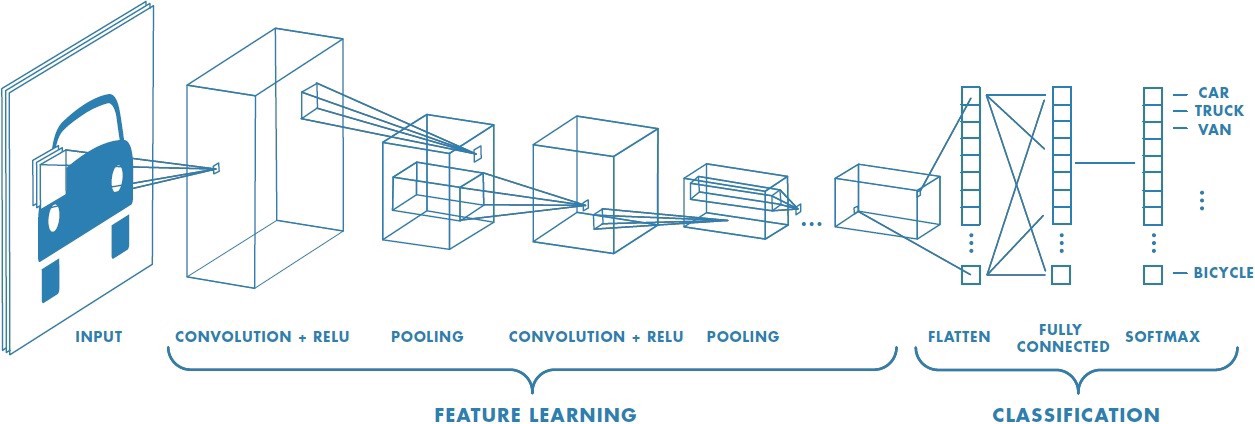
Deep learning is a specific ML technique based on using multiple neural network layers. There are different algorithms but the one that’s often applied for image classification is called convolutional neural network. This type of algorithm has adaptive image filtering through network layers, then performs the classification on the trained model and results into labeled output like you would with any classifier.
Use the Force to Learn about ML
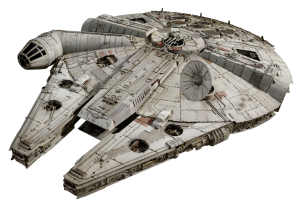
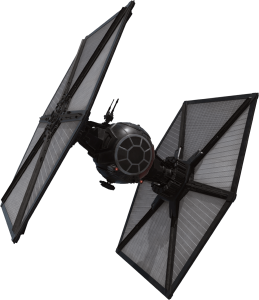
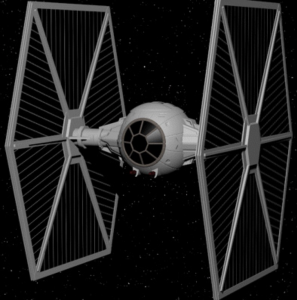
Now that we have a basic understanding of classification and deep learning, let’s create a critically important application example in which it identifies two aircrafts from the Star Wars franchise. In this article we’re building a binary classifier to solve this problem. The reason why we’re not using a multiclass classifier, is because we’re only identifying the input image as the Millennium Falcon or the Tie Fighter. For those who are not familiar these names, shame on you! These are the most iconic aircrafts that I’m talking about:
Dataset preparation
As mentioned, each ML model will start by gathering the dataset. This can be a very time consuming process, therefore we will skip this part for now. We’ll use a prepared dataset containing only 60~ images for each label. Normally you’d want to create a dataset that contains many more images but it will work just fine for our use case. The general rule of preparing the dataset is to keep the amount of images equal to each label, otherwise you might create a biased ML model. Our dataset contains a labels file, a training file which maps the images to a label and a folder of images.
Defining the neural network architecture
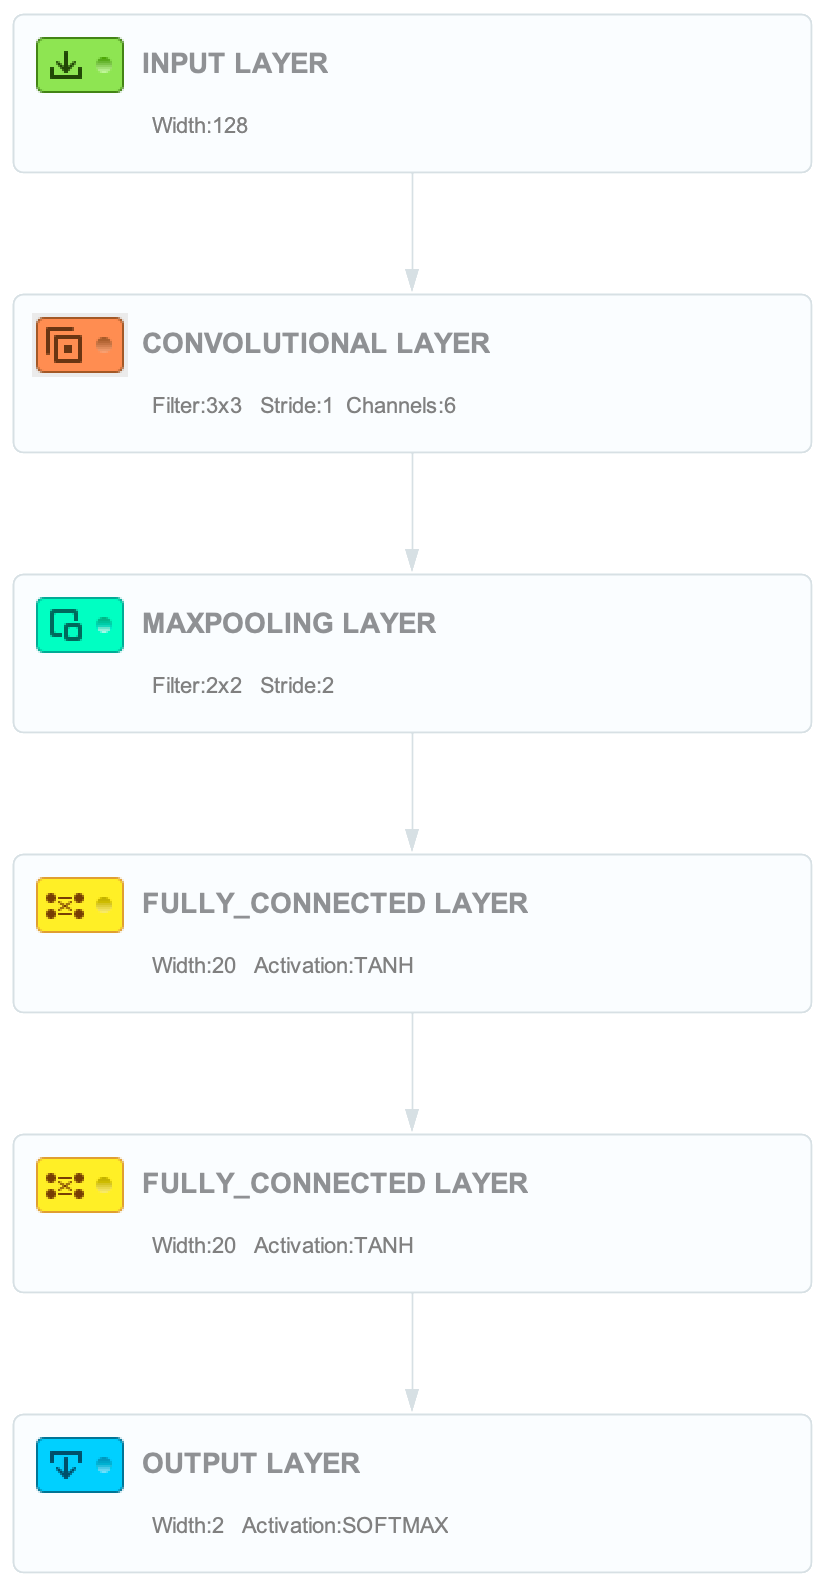
The image classifier demands a network architecture to train the ML model. Picking the right architecture is important. Depending on the needs of the project, you might want to pick a smaller architecture to reduce training time and still train a model that will have a good accuracy. Because we have a really small dataset and picking the largest architecture won’t make any difference in the resulting accuracy, we will use the architecture that is used in the MNIST example.
Training the ImageClassifier
Using JSR-381 exposes the ImageClassifier using neural networks. We start by first creating a new builder instance:
ImageClassifier<?> classifier = NeuralNetImageClassifier.builder()
      …
      .build();
It’s important to let the builder know which class type you wish to perform classification on. Because not all implementations will be able to classify that input class with the exception of the BufferedImage class. That one is supported by all implementations so we can safely use it:
ImageClassifier<BufferedImage> classifier = NeuralNetImageClassifier.builder()
      .inputClass(BufferedImage.class)
      …
      .build();
You can see the difference between the snippets where the generic type of the resulting ImageClassifier is changed. There’s no need to cast the resulting ImageClassifier yourself because that’s been taken care of within the API.
The dataset configuration is coming next. All images within the dataset should be normalized. This means that all images should have the same width and height. Depending on the implementation, the implementation might normalize the images as a preparation step but this will definitely slow the process of training the actual ML as it’s a part of preparing the dataset. Increasing the size will allow better accuracy most of the time but it also requires more computing time so training the model will take longer.
The MNIST example has an image width and height of 28 pixels. In this use case with these few images in our dataset, setting the width and height to 128 pixels was showing better results. Bigger resolutions will contain more content and information that might improve the ML model while training the neural network (Listing 1).
ImageClassifier<BufferedImage> classifier = NeuralNetImageClassifier.builder()
      .inputClass(BufferedImage.class)
      .imageWidth(128)
      .imageHeight(128)
      ...
      .build();
Listing 1
Afterwards, we specify the location of two files. One file for all the labels that you want to use and one that contains the mapping of all images with the corresponding label (Listing 2).
ImageClassifier<BufferedImage> classifier = NeuralNetImageClassifier.builder()
      .inputClass(BufferedImage.class)
      .imageWidth(128)
      .imageHeight(128)
      .labelsFile(new File(“...”))
      .trainingFile(new File(“...”))
      ...
      .build();
Listing 2
The architecture of the neural network is defined in a JSON file and copied from the MNIST example. Because we don’t want to change the architecture, there are two layers which have to be changed. The input layer has to be set to the same image width and height of 128 pixels and the output layer should return two labels, because we’re only classifying the Millennium Falcon and the Tie Fighter. We pass the architecture file to the builder.
      …
      .networkArchitecture(new File(“...json”))
      …
Next, we export our model to a file and set that parameter as well. It’s completely optional, but training the model may take some time and you don’t want to retrain the model each time you wish to use it.
      …

      .exportModel(Paths.get(“starwars.dnet”))

      ....
Finally, we have to set the training parameters. These are parameters that have to be experimented with to “guess” which settings suits the model in order to get the best results in a decent amount of training time. Training this model only took a couple of minutes. This is relatively fast and training it with more iterations didn’t show any significant difference in the accuracy.
ImageClassifier<BufferedImage> classifier = NeuralNetImageClassifier.builder()
      .inputClass(BufferedImage.class)
      .imageWidth(128)
      .imageHeight(128)
      .labelsFile(new File(“...txt”))
      .trainingFile(new File(“...txt”))
      .networkArchitecture(new File(“...json”))
      .exportModel(Paths.get("starwars.dnet"))
      .maxEpochs(1000)
      .maxError(0.3f)
      .learningRate(0.01f)
      .build();
Listing 3
The maxEpochs setting sets the maximum amount of iterations before stopping the model’s training process (Listing 3). The maxError setting is used to stop the training once it hits the error rate of the training process. The learningRate setting is how fast you wish to train the model. With a lower rate it takes more time to train the model but that doesn’t have to improve the accuracy. Meaning, it will have more iterations/epochs and takes more time to hit the maximum error rate.
Put the trained model to use
Finally, we’ve trained the model! Now I’d like to classify an image that was not used in the dataset and see if my model can identify it. I randomly took images of the Tie Fighter and the Millennium Falcon from Google search and ran it into the model. The ImageClassifier accepts the generic type, InputStream or File as input:
BufferedImage tieFighter = …;
Map<String, Float> results = imageClassifier.classify(tieFighter);
System.out.println(results)
The console would output similarly to:
{ “tie_fighter”: 0.78f, “millennium_falcon”: 0.22f }
The accuracy is approximately 80 percent which shows a decent distinction between a Tie Fighter and a Millennium Falcon. I wouldn’t want to rely on 80 percent accuracy during an intergalactic dogfight, but it’s good enough for our learning purposes. In a future version of the API, additional statistical evaluation should be performed after training the model to determine the accuracy.
Summarizing what’s learned and what’s upcoming
The article described the goal of JSR-381, taught a basic understanding of image classification and deep learning and allowed you to create a ML model step by step by using only JSR-381. In case you only want to run the code, go to the GitHub repository at github.com/JavaVisRec/jsr381-starwars
What’s to be expected in the future
Many features beyond the current set are in the planning stages for JSR-381. The following major features are very likely to be added in the upcoming versions.
- Export models as ONNX (Open Neural Network Exchange);
- Model evaluation;
- Object detection;
- Transfer learning.
Become a part of the VisRec community
The VisRec working group is always looking for anyone to help, test and develop features for the next versions of the API. Feedback is also always welcome. Visit groups.io/g/visrec
By: Kevin Berendsen

Kevin Berendsen is software engineer at OpenValue, maintainer of JSR-381 and passionate about bringing Java and ML together.